Sale-A-Bration

Sale-A-Bration is here! For every $50 you spend, you get your choice of free products from Stampin' Up! Stamps, paper, accessories, and digital content are available. You don't want to miss your chance to earn some fabulous product.

Friday, December 24, 2010

Last of the Christmas Projects

I wanted to share the last of my Christmas Projects, our Holiday cards.

First, the photo greeting card that I created using My Digital Studio.  I like to make a photo greeting card for a few of our family and friends that I would normally give a photo with our Christmas Card.

Now for our Christmas Cards.  I failed to think through how much paper I needed and thought I had more on hand, so I ended up with two designs so I could make full use of my available materials.  Both card designs are very similar in layout and use the Rejoicing in Christmas stamp set.  I also used a color palette on all cards that coordinate well with the Deck the Halls Designer Series Paper.

The first design uses Early Espresso for the base of the card.  I used some Cherry Cobbler seam binding and gathered it as I adhered it to my Deck the Halls Designer Series Paper.  I just used Snail adhesive to gather the binding as I glued it down.  I embossed my image onto a piece of Cherry Cobbler using Gold Stampin' Emboss Powder.  I stamped my sentiment onto a piece of Very Vanilla card stock using Early Espresso Classic Stampin' Pad and then punched it out using the Decorative Label Punch.  I distressed the edges using my Early Espresso Stamp Pad.  After that, it was just assembly time using some Stampin' Dimensionals.


The second design is similar to the first using a similar layout and the same Deck the Halls Designer Series Paper.  This time, I used Stazon and stamped the image onto watercolor paper.  I then used my Aqua Painter Pen and watercolor pencils to color each image.  I used Cherry Cobbler for the card base and layered my image onto a piece of designer series paper and then added a second matching strip that I crinkled as I adhered it to the card front.  As with the seam binding, I crinkled the paper strip as I adhered it to the card using Snail.  I embossed a star in the left corner using the Gold Stampin' Emboss Powder.  I added the sentiment to the bottom left corner using Early Espresso Stampin' Pad.

And the last Christmas project- a Reindeer Bag full of Christmas cookies (held by the lovely Tessa).  I rounded the top of a regular brown paper lunch bag to resemble a reindeer snout and then folded it over.  Using the scrap pieces, I made some ears that I glued onto the bag at the fold.  I cut antlers freehand from Early Espresso card stock and glued it to the back of the bag.  I used my circle punches to punch a nose from Real Red and eyes from Basic Black.  Around the edge of the nose, I added some Dazzling Diamonds.  On the eyes, I added a bit of white to complete my Reindeer.  This guy is holding a candy cane in his mouth because I forgot to put it in the bag. 

Merry Christmas and Happy New Year!
God Bless and Happy Stampin'!
Charity

Wednesday, December 22, 2010

A Few More Ornaments

Here are a few ornaments that I made after the 12 Days of Christmas, using similar techniques as described in previous posts.

This ornament is made using the Deck the Halls Fabric and Top Note Die Cut for the Shot.  I created a little ribbon wreath by tying small pieces of ribbon and fabric strips onto a small ring.  Once the ring was full, I added a bow at the top and some Rhinestones.  I sewed the wreath to the ornament.  I used lace for the ribbon hanger.  All materials are from Stampin' Up!.


The next ornament is Candy Cane Lane fabric cut with the table setting die cut and then glued to a mason jar lid, embellishing with buttons, brads, and ribbon.  I used different prints on the two sides.


For the next ornament, I cut fabric circles using my circle die cut and made rosettes using buttons for the flower center and lace for the hanger.


For this ornament, I cut several small circles from fabric.  I applied some glue to the fabric and used a small skewer to poke each piece into a Styrofoam ball, alternating the fabric prints.  I used a large needle to thread a piece of fishing line through the top for use as a hanger.


This ornament is supposed to resemble a lollipop.  I cut a strip of fabric using the Table Setting Die Cut and then spun the spiral together like a lollipop.  I made two pieces like this and then sandwiched a skewer between the two pieces.   I added some Dazzling Diamonds to both sides to make it look like some sugar.  I then covered it with a clear bag and secured it with some satin ribbon.   I threaded fishing line through the fabric and the bag to use as a hanger.


The next ornament also uses a Styrofoam ball.  I poked a skewer into the ball and covered it with Tombow Liquid Glue.  I sprinkled Champagne Glass Glitter all over the ball.  After the glue dried, I added a clear bag and secured it with a strip of fabric. 


And, the final ornament for 2010.  Another top note fabric ornament.  For this one, I applied some of the iron on fabric adhesive to a piece of coordinating fabric and then punched it out using the ornament punch.  After, I ironed onto my fabric ornament and added some stitches around the edges of the small ornament.  I used lace for my hanger and added a button to one side and a brad to the other side.


God Bless, Merry Christmas and Happy Stampin'!
Charity

Monday, December 20, 2010

Christmas Tree Topper

As promised, now it is time to share the star Christmas Tree Topper that I made.  For this tree topper, you need to cut two five point stars using your Big Shot.  I cut mine from the cardboard inserts that come in Designer Series Paper.  I also cut enough fabric (I used the Deck the Halls Fabric) to cover both sides.  I ended up trimming the tabs from the fabric thinking that it would make it easier to assemble, but it left me with some short edges that are somewhat noticeable if you look closely enough.  I would suggest trimming the fabric tabs but do not cut them entirely off.  Use the Big Shot Adhesive to adhere your fabric to the star pieces.  Then, assemble each star using your favorite strong adhesive.  Once you have each star assembled, embellish with additional fabric, brads, buttons, glitter, etc.

Cover a toilet paper tube with fabric or Designer Series Paper and emblish the lower edge with ribbon or glitter.

After the stars are embellished to your desire, glue one star to the toilet paper tube using a hot glue gun and then add the second star using hot glue along the edges to connect the two stars.  You will also need hot glue on your toilet paper tube.  Now it is ready to add to the tree.


This star was a prize in my current contest.  I did the drawing and our winner is Kathy D.  Congratulations to Kathy!  Enjoy your tree topper.

God Bless and Happy Stampin'!
Charity

Thursday, December 16, 2010

On the 12th Day of Christmas, Stampin' Up! Gave to Me

Stamps of course.

For the twelve day, I've saved one of my favorite techniques.  Stamping on bakable clay.  I think I like this technique because it is so simple, yet beautiful.  Also, it is one of the first techniques I did with a rubber stamp.  Years ago, our church decided to give out Christmas Ornaments to visitors during Advent and I found instructions online to stamp onto unbaked clay to create an ornament.  These made nice ornaments because they aren't overly fragile which makes transport a little easier and they are very easy to make.

To make these ornaments, I used a pasta machine to roll out my clay.  I used Fimo but any of the baking clays will work ok.  Lighter ones tend to work best.  I've also found that line art stamps work well.  Once the clay is rolled out, you simply stamp using normal ink right onto the clay.  After, I cut to shape.  You can use a cookie cutter or a knife around the image, whichever you prefer.  Add a hole to the top to add ribbon or hemp twine for the hanger and then bake according to the manufacturer's instructions.  Allow to cool completely before handling and then add ribbon or twine as a hanger. 

For the ones shown here, I used Real Red 3/8" grosgrain ribbon and Hemp twine as my hanger.  For my stamped images I used Northern Hearts and Rejoicing Christmas.  For the Holy Family I used Chocolate Chip ink and for the snowflake I used Marina Mist. 

God Bless and Happy Stampin!

Charity

Wednesday, December 15, 2010

On the 11th Day of Christmas Stampin' Up! Gave to Me

Candy Cane Lane Designer Series Papers.

For the 11th Day, I'm going to share some Victorian Cones.  This was my first attempt at Victorian Cones and I used some simple instructions found online, cutting a large circle and then shaping my paper into the cone.  I found that I preferred the cone shape that resulted from cutting out a section of the circle to create a bit of a "Pac Man" shape. 

I filled my cones with shredded paper and Tinsel Trim.  I used Tinsel Trim and Real Red 3/8" grosgrain ribbon for embellishments and hangers along with some glitter brads and metallic snowflakes cut with the Northern Frost Die Cut. 

The cones are actually something I'd like to play with a bit more to see if I can achieve the perfect look as I'm not entirely satisfied with these.

God Bless and Happy Stampin!
Charity

Tuesday, December 14, 2010

On the 10th Day of Christmas Stampin' Up Gave to Me

More Punch Art Favorites.

For this ornament, I went with a simple and common Santa Punch art for the design.  I again used the Top Note but this time I used Candy Cane Lane paper to cover the chipboard.  Unfortunately, this Designer Series Paper is no longer available, but you can use the Candy Cane Lane fabrics which has three of the paper designs, as a substitute. 

As with my Nativity Punch Art Ornament, I found inspiration online for this Santa but have since lost my bookmarks, so if I've CASE'd your design, please email me so that I can give you proper credit!

Both sides were covered with the paper.  On one side, I used my Naturally Serif die cut and used the letters to spell out "Ho! Ho! Ho!"  I used silver floral wire to create my hanger and I tied some small strips of Candy Cane Lane Fabric to the hanger. 


For the santa, I used the following punches:
  • Scallop Circle
  • 1 3/8 Inch Circle Punch
  • Crop A Dile (Large Circle)
To create the Santa, I cut a triangle in Real Red that was slightly larger than my head along with a rectangle in Whisper White.  The rectangle is not as long as the edge of the triangle such that when one edge of the rectange is lined u
p with the point of the triangle, it looks like the point of the hat is folded over.  I used my Crop-A-Dile to create a small little puff ball at the end of the hat using Whisper White.  For the face.  I punched a 1 3/8" circle from Very Vanilla that I colored with my Blush Blossom marker.  I used a pink marker to create rosy cheeks.  For the beard, I punched a scalloped circle from Whisper White and then trimmed part of the top off and glued it back on, scallops down, to create the mustache.  I added a nose punched with the Crop-A-Dile, also colored with the Blush Blossom marker.

Monday, December 13, 2010

On the 9th Day of Christmas Stampin' Up! Gave to Me

Nativity Punch Art.

My general preference with Christmas is to keep the Christ at the center of our holiday so I like to make decorations and ornaments that keep that focus on the true meaning of the holiday.  I decided to do a search on nativity punch art and found a few nativity scenes that brought me some inspiration for this particular ornament.  I've since lost some of my bookmarks so I no longer have all the links to give credit for inspiration.  If you see something similar to what you have created, please post me a comment or send me an email so that I can give you proper credit.

For this ornament I used my Big Shot to cut a Top Note from chip board and then I covered with Deck the Halls Designer Series Paper.  On one side, I used the portion of the DSP with the words "hope" and "love" on it.  I added a single rhinestone from the Basic Rhinestone jewels at the end of the "e" in love.  For the hanger I used Chantilly 1/2" lace, knotting the end and having it show on this side.  The knot looks a bit like a small rosette. 


On the other side, I added my manger. I used one of the pieces with more brown shades and then added some Very Vanilla with distressed edges.  To this, I added my manger.  I just cut my Chocolate Chip into the desired shape, adding two legs.  I created straw by cutting thin strips of Crumb Cake and then ran them through the Crimper.  To create the Baby Jesus, I used my Blush Blossom marker and colored a small section of Very Vanilla before punching out a circle using my 3/4" Circle Punch.  I then used my Versamark Marker and used my Gold Emboss powder to create a gold area to also punch with my circle punch using the 1 1/4" punch.  Using my 1 3/4" punch, I punched a large More Mustard circle to create my blanket.  I folded the circle and then tucked in the face with the golden halo behind.  Then I just laid the baby in the manger.  I added  a star using the Basic Rhinestones.


This ornament recently found a home on a friend's tree.  I really do like the design and hope to create some more.

God Bless and Happy Stampin!

Tuesday, December 7, 2010

On the 8th Day of Christmas, Stampin' Up! Gave to Me

Snowflakes Big and Small!  How many of you loved the felt snowflakes that Stampin' Up! sold last year in the Holiday Mini?  I know I did.  In fact, I still have several that I use for decorations at Christmas.  I think I also may have mentioned my love for snowflake Christmas ornaments in one of my previous posts, so I naturally was very excited to see the Northern Frost Die in this year's Holiday Mini.  I loved that it offered different shapes and designs all in that strip.  I had images of garlands and ornaments right away!

I used some thin aluminum sheets that I bought at the local craft store in a blue, pink and silver.  I cut several in each size and color.  Since the die offers three sizes, I connected a large, medium and small snowflake together using fishing line.  Each chain of snowflakes had 1 snowflake in each color.  I tied a small bead to the bottom of the last snowflake and also used fishing line for the hanger.  I cut some strips of Candy Cane Lane Designer Fabric and tied that to my fishing line.  The result?  A simple but beautiful ornament. 

Word of caution... hang them high on your tree as they will attract your cat if you have one.  Our cats seem to be particularly found of the Christmas tree and whacking any ornaments within reach. and they found these to be very entertaining.  And speaking of cats and Christmas trees, I keep hearing a noise from our living room.  All the kids are asleep and Tim had to run to our church to pick up my phone, crazy cats!

God Bless and Happy Stampin'!
Charity

Monday, December 6, 2010

On the 7th Day of Christmas Stampin' Up! Gave to Me


Beautiful Designer Fabrics!  I've waited far too long to post about Designer Fabrics.  I LOVE the Designer Fabrics and I've really been enjoying making ornaments with them and I'm looking forward to making some more projects using these fabrics.  All the ornaments I've been making are CASE's of ones in the Holiday Mini or ones on display at Convention. 

For all of these ornaments, my general approach was to apply Fabric Adhesive to my fabric and then sandwich some quilt batting between two pieces and iron it to seal.  I then cut out my ornament using the Scallop Square die cut.  I sewed the edges together and embellished using fabric pieces cut with Tasteful Trim or Circles Die and Big Designer Buttons or Vintage Brads.  I also used some wire to make some hangers, the Naturally Serif die cut for some felt letters to add to one of the ornaments and even some miscellaneous beads from my craft box.  The photos in this post are just a small sampling of the ornaments I've been making.  Like I've said, I've really enjoyed making these ornaments and I've been trying  a variety of embellishments.

In addition to the Scallop Square ornaments, I've also used my Circles Die Cut to create a large circle and sewed two together sandwiching Old Olive Grosgrain Ribbon and Crochet Trim.

I've also been working on a few using the Top Note punch which I'll have to share later in the month.  I must say, these do make great additions to your Christmas Tree and I do plan to make some more to use for gifts this holiday season in addition to the ones on my Stampin' Up! Tree.


God Bless and Happy Stampin'!
Charity

Sunday, December 5, 2010

On the 6th Day of Christmas, Stampin' Up! Gave to Me

A Petal Card Punch.  This next ornament is a CASE of one I received in an ornament exchange I participated in a few weeks ago.  Jan Carlson made one that looked like a little gift bag.  This is also a great size to package a single little mini candy bar or Hershey's Nugget.

For this ornament, punch two petal cards.  I cut mine from Candy Cane Lane Designer Series Paper.  I embellished one card with a snowflake I cut using the Northern Frost Die and and thin colored aluminum sheets.  Then glue the two cards together at the side flaps and bottom flaps leaving the top open.  Use the Crop-A-Dile to punch a hole on each side of the bag and use Tinsel Trim or ribbon for the handle.  Add some strips of scrap paper.  You can also use the Jewelry Tag punch to add a little tag with a short sentiment on it.

God Bless and Happy Stampin'!
Charity

Saturday, December 4, 2010

On the 5th Day of Christmas, Stampin' Up Gave to Me

Candy Cane Lane Designer Series Paper and Punches. My next two ornaments are very similar to the snowman from Day 4.  The first is very simple, I used my Designer Label Punch and punched several labels from two different Candy Cane Lane prints.  As with the body of the snowman on Day 4, I folded them in half and glued them together alternating the prints that were visible.  Before glueing the final parts together to "close" the ornament, I ran some 1/8" Real Red grosgrain ribbon through the middle to use as a hanger.

For my second punch ornamnet, I used my 1 3/4" Circle punch.  For each of these, I created a slit on each side of the circles and I threaded a strip of Real Red card stock through those slits and added some Basic Rhinestone Jewels.  The hanger was done in the same way I did before.

Remember, if you attend any of my events this holiday season, you can pick a handmade ornament from my tree.

God Bless and Happy Stampin'!
Charity

Friday, December 3, 2010

On the 4th Stampin' Up! Gave to Me

I fallen a little behind in getting the 12 Days of Christmas Ornaments up so I'm going to get caught up!

On the 4th Day of Christmas, Stampin' Up! gave to me beautifully coordinated card stock.  This ornament is a fun little snowman using a variety of punches and a few scraps of fabric and trim.  I started with the extra large ornament punch and punched several ornaments using Whisper White.  I folded each one in half and then glued them together for a three dimensional effect.  I also fed some fishing line through the center of ornaments.  I punched two additional circles from Whisper White using my 1 3/8" punch to make the head.  I drew the face free hand using my Stampin' Write markers.  For the arms and legs, I actually used the Build-A-Bear punch, using my Stampin' Write markers to add the mittens and shoes.  I glued the arms to the ornament body and tied the legs on using the fishing line I had ran through the body.  The head pieces were glued to each other with the fishing line in between.  I also added some Clear Tinsel Trim.  For the scarf, I used some of the Candy Cane Lane Designer Fabric that I originally cut with Tasteful Trim.  Every snowman needs a top had so I cut two squares and two rectangle strips from Basic Black and assembled my hat, still sandwiching my fishing line in between.  I finished it off with some more Candy Cane Lane Designer Fabric.

God Bless and Happy Stampin'!
Charity

Tuesday, November 30, 2010

On the Third Day of Christmas, Stampin' Up! Gave to Me...

Build a Bear Workshop.

Here is a Build a Bear project where you don't have to do too much altering of the die.  I created a Santa Bear and an Angel Bear.  The only trick to these ornaments is that when you cut the wings for the angel, use the Butterfly die and then put the wings on upside down. 

For the Santa Bear, use the Beary Merry Die Cut to cut the clothing and the Bear Die to cut the bear.  I cut everything using stiff felt.  For the clothing, I added Big Shot Multipurpose Adhesive Sheets to the felt to make for easier assembly.  This is totally unnecessary, but if you are doing this project with the kids, it makes the project go smoother for the kids and you don't have to wait for glue to dry.  You can also do the same with craft foam.  You can also find craft foam with adhesive already on "installed."  Once your bear is dressed, just glue it to a wooden clothes pin.  Use the same technique to make a Mrs. Santa Bear.


For the angel, I cut her clothes using the Beary Dressy die cut and I also my wings from a window sheet using the Beautiful Butterflies die.  I sponged some Shimmer Paint onto the wings to give them some sparkle.  I dressed and assembled the ornament, attaching it to another clothes pin.  You could also make a boy angel just using the regular clothing dies.

God Bless and Happy Stampin!
Charity

Monday, November 29, 2010

On the Second Day of Christmas, Stampin' Up! Gave to Me...

Aluminum Cans.

Did I say aluminum cans?  On what page do you find aluminum cans in the Idea Book?  Of course you don't find aluminum cans in the Idea Book, but you do find the Big Shot and Dies beginning on page 204.  Most of you who are familiar with the Big Shot know that the rule based dies aren't just for cutting paper. They can also be used for wood, vinyl, fabric, plastic, cork board, chip board, and even aluminum.  I guess you would call these projects "repurposing" the aluminum cans since they are going from a beverage holder to a Christmas ornament. 

To start, you will need a good pair of gloves to protect your hands when you cut apart the cans.  You'll also want to rinse all the cans out very well before beginning.  Cut the cans apart, discarding the top and the bottom (you can save the tabs to use as an embellishment on cards and scrapbook pages).  Cut the can open cutting down the length of the can.  Once it is flat, place on your die, making your sandwich and cut as you would paper.  Wear your gloves when discarding the scraps, but the ornament itself will have smooth edges. 


I made snowflakes, stars and even some icicles.  For the snowflakes, I used the Snowflake #2 Die.  The edges will be nice and smooth once cut.  Since there are openings in the flake, you don't need to punch any additional holes to create your hanger.  Use ribbon, fishing line, fabric strips or tinsel trim as your hanger.  I pretty much used a mix for my ornaments.  I had some fun cutting some strips of fabric with the Tasteful Trim Die and using that for hangers.


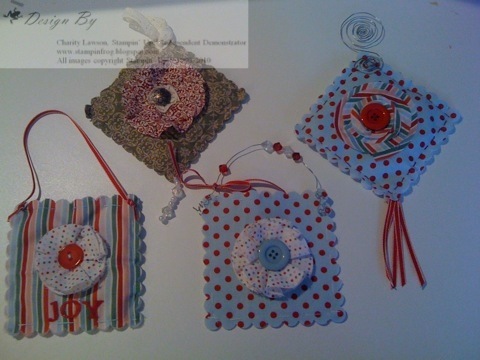
For the stars, I used the Stars #2 die and created two styles of ornaments.  One with single stars and one with triple stars, stringing them together with fishing line.  I used my Crop-a-dile and paper piercing tool to create the holes I needed for the hanger and to connect the stars.  Again, for hangers, use ribbon, tinsel trim, fabric strips, or fishing line


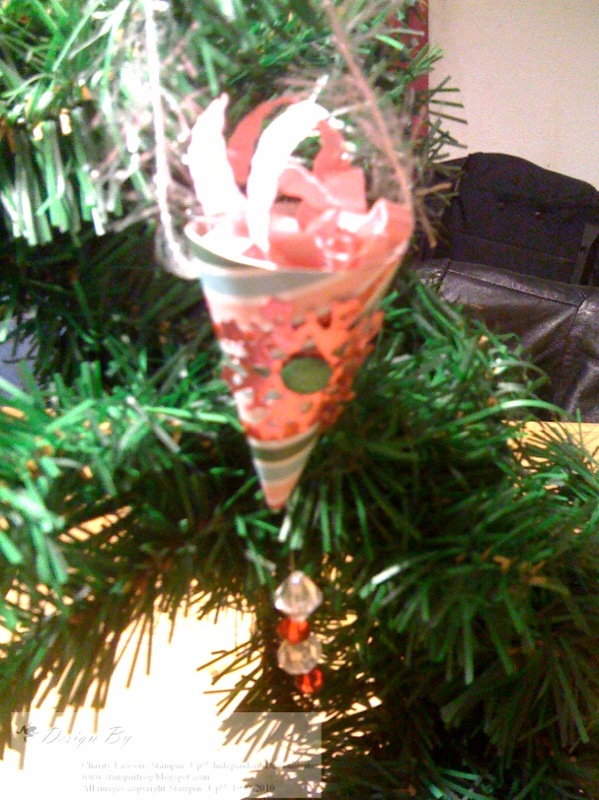
For the icicles I used the Tasteful Trim and Table Setting dies to cut aluminum strips.  When using the Tasteful Trim die, the can will not go the entire length of the die so you will end up with one sharp end.  This end should be carefully folded over using pliers to hide the sharp edge.  This is the end I used for my hanger.  I twisted my pieces to get a spiral effect.  I also used the Table Setting die to create a spiral ornament adding some clear beads to the bottom using fishing line.  This gave it just enough weight to pull the spiral out just a bit.  I used fishing line for the hanger.


That's day 2, aluminum cans and a Big Shot.  I personally love the look of the snowflakes and it reminds me of the first Christmas Tree that Tim and I had as a couple.  We had very little money, just enough to buy a very small tree, just about 5 feet tall.  We were able to add a few lights and a very small number of ornaments by spending a few dollars at the dollar store.  I think we spent $30.  It was a modest tree to say the least.  One evening, as I sat looking at our tree, I decided it needed more.  I spent the evening cutting snowflakes using some plain white paper and hung them to our tree using paper clips.  Suddenly, our tree was a little prettier.  Now, our tree is filled with ornaments we've collected over the years but every year, we find one or two of those paper snowflakes in the box and they go on the tree.  I can just imagine how beautiful our first tree would have been if I'd had a Big Shot in my hands!

God Bless and Happy Stampin!
Charity

Sunday, November 28, 2010

On the First Day of Christmas, Stampin' Up! Gave to Me...

Designer Series Papers.

The first ornament I'm going to show you is a very simple mini gift box wrapped in designer series papers.  The mini gift boxes are little paper mache boxes that I purchased at a local craft store.  You can probably use any small boxes you have that would be appropriately sized for a small gift.  In addition to a small gift box you will need the following:

  • Designer Series Paper- I used Jolly Holiday
  • Card Stock:  Real Red Card Stock
  • Stamp Set:  Tags til Christmas
  • Ink:  Early Espresso
  • Frost White Shimmer Paint
  • Real Red 1/8" Taffeta Ribbon
  • Clear Tinsel Trim
  • Fishing line or clear thread

  • I wrapped the bottom and lid of the box separately, securing with Tom Bow multipurpose liquid glue.  Before gluing the lid to the bottom of the box, I used my paper piercing tool to make two small holes in the box to allow me to add some fishing line as the ornament hanger.

    Once the box was wrapped with the lid glued to the bottom, I tied a bow around the box using the Real Red ribbon.  I stamped my sentiment onto the Real Red card stock using the Early Espresso ink.  After, I sponged some Frost White Shimmer Paint onto the edges of the tag and tied it to my little gift box using the Clear Tinsel Trim.

    This one is very simple and can easily be done by anyone.  It is also a great way to use up some of your scrap pieces of Designer Series papers.

    See you tomorrow for the 2nd Day of Christmas.

    God Bless and Happy Stampin'!
    Charity

    Saturday, November 27, 2010

    12 Days of Christmas

    I have been a busy little elf the last few weeks, making lots of Christmas ornaments and decorations- using Stampin' Up! products of course.  I have a very special reason for doing this.  Years ago when I was in junior high, my family and I traveled to Florida to celebrate Christmas.  This was such a fun trip for all of us and only the second time we had been back since moving to Washington.  In addition to some of the normal tourist things- beach and waterskiing in December and Disneyworld- we went to several family gatherings.  One was bit of a family reunion with my Dad's cousins.  She welcomed us into her home and showed us a beautiful Christmas tree filled with handmade ornaments.  She invited us to each select an ornament that she had made to take home with us.  This has always been one of my favorite holiday memories and I've always wanted to do something similar.  Well, 2010 is my year!  I've set up a special Christmas tree in my family room/studio and I'm filling it with Stampin' Up! Christmas ornaments from top to bottom!  I've used punches, papers, fabrics, ribbons, buttons, die cuts and more to create a variety of ornaments for my tree.  I'll be adding more throughout the month and each time someone visits my home for any reason, they will be able to pick an ornament from my tree. 

    And of course, I will be sharing all the various ornaments and decorations with you so today marks the introduction to The 12 Days of Christmas, Stampin' Frog Style.  Over the next 12 days, I will sharing the various types of ornaments I have made for you, finishing up with my star.  I'll also work in a few home decorations in between the 12 Days posts.  The posts will be categorized to some extent by ornament type (fabric, punch art, die cut, etc).

    As a little preview, here is a picture of the tree. At the top of the tree you will see a 5 point star covered in Stampin' Up! Designer Fabrics. I'm running a contest to win that star.  You earn entries into the drawing by purchasing products, attending workshops/classes, hosting shows and joining my team.  Check out my contest page for more details.

    I also have a few photos of a wreath with some of the ornaments on it.  A wreath can be a clever way of displaying Christmas decorations or creating an advent calendar countdown.  You can make some match boxes to attach to the wreath and then add some chocolates or little toys to the boxes to use for the countdown. 


    As for the decorations and some instructions, stay tuned and come back daily to see what each day brings!  I hope you will be inspired by all the projects and maybe start a new holiday tradition in your home.

    Happy Stampin' and God Bless!
    Charity

    Thursday, November 25, 2010

    Happy Thanksgiving!

    Thanksgiving has arrived!  This is one of my favorite holidays.  I love getting up early to cook for my family and friends- using recipes taught to me by my grandmother as well as a few new favorites I've learned along the way.  This year, Thanksgiving was ushered in with a large winter storm bringing snow, wind, and freezing tempeartures to Washington.  In fact we are getting another round of snow as I type this!  Looks more like Christmas.  The weather and icy roads will be keeping family away this year so it will just be Tim, the kids and I for Thanksgiving.  Six people to share a 21 pound turkey!  I think we will have lots of leftovers.

    I wanted to share our Family Thanksgiving card with all of you.  I loved the layout of one of the cards from the Portland Regionals that I decided to use it for our Thanksgiving cards.  Please refere to the original post for details on dimensions, as this card has an off center fold.  I changed the front just a bit, using different images from Day of Gratitude and adding some Autumn Spice Designer Series paper to both the inside and outside of the card.  I also used Teeny Tiny Wishes and God's Blessings for the sentiments.  I also used Crumb Cake and Very Vanilla in exchange for the River Rock and Whisper White used in the original card.  I used the Crumb Cake because I was out of River Rock and I used Very Vanilla because I wanted less contrast.

    Don't forget about the great Online Spectacular going on now.  HUGE discounts on some of your favorite things, including 50% off My Digital Studio!  What a great savings.  The sale ends November 30 so don't miss out.

    I hope to get a little paper crafting done while that huge turkey is in the oven so I may have some more posts later in the day.  Either way, may you and yours have a Blessed Thanksgiving and a beautiful start to your Holiday Season.  I'll certainly be counting my blessings today!

    God Bless and Happy Stampin'!  I'm off to make some stuffing!
    Charity