Sale-A-Bration

Sale-A-Bration is here! For every $50 you spend, you get your choice of free products from Stampin' Up! Stamps, paper, accessories, and digital content are available. You don't want to miss your chance to earn some fabulous product.

Tuesday, February 14, 2012

Valentine Cards for Kids

I wanted to share the Valentine Cards that Liam and Tessa made for their classmates. Both picked little goodies to give to their classmates so we had to do some kind of 3D project. Plus, it had to be simplified to allow both kids to complete with little frustration on everyone's parts!

Liam had two designs, one for the toys he picked for the boys and one he picked for girls. For the boys, he picked little toy dinosaurs but I didn't have any dinosaur stamps or MDS dinosaur brush art! Time to get creative. Punch art is a great "go to" for this situation, but small kindergarten hands and tired mommy would not go well when mixed with 16 Valentine's. So, I decided to do my punch art in My Digital Studio and create a small bag topper Liam could use for his dinosaurs.


Once I printed onto Whisper White card stock, I cut and folded for Liam. He wrote all the names and his sisters helped him staple to the cellophane bag.

For the girls, we used the Totally Amazing stamp set, Fancy Favor die cut, 2 1/2 inch circle punch, Real Red card stock and bakers twine. Liam picked out fun little Valentine notepads.


Liam loves mazes so I knew we'd be buying the Totally A-maze-ing stamp set and it worked great for his Valentine's. I cased the envelope from another demo, but I failed to write down her information. So, if this was you idea first, let me know! Anyhow, cut your card stock to 8 1/2 x 5 1/2. Then use the fancy favor to cut one front and two sides of the box (don't use the side with the sealing flap). Cut off the rectangular bottom flaps and then fold and stick. Here is a picture of the back:


Embellish and decorate. His sisters and I helped with attaching the twine but Liam glued on the mazes and wrote all the names.

Tessa did a similar design using My Digital Studio for the front artwork.


The boys had sports themed notepads which did not fit so we used the scalloped square die cut with folded card stock and sealed two sides:


Again, I tied on the twine but Tessa did the rest.

I can't wait to hear how their parties went and see if their classmates liked their Valentines.

Happy Valentine's Day to You! God Bless and Happy Stampin'
Charity


- Posted using BlogPress from my iPhone

Thursday, January 19, 2012

Sale-A-Bration is Coming

A stampers favorite time of year- Sale-A-Bration is coming to a  Stampin' Up! party near you- maybe a Stampin' Up! party in your home!  Sale-A-Bration will begin January 24, 2012 and ends March 31, 2012.  Any workshops or orders placed during this time are eligible for Sale-A-Bration benefits.  During Sale-A-Bration, customers can earn free items for every $50 and this makes it a great time to be a hostess because customers have larger orders.  We've also just introduced the new Occasions Mini Catalog so there are lots of great new products for your guests to choose from.  The Sale-A-Bration Catalog is offering an exclusive tote for all hostess with a qualifying $150 show and an exclusive Hostess Bundle for all $400 workshops. 

Contact me today to book your workshop. 

Tuesday, January 17, 2012

A Camping Themed Slumber Party

For Isabel's 13th Birthday, she wanted a camping themed slumber party.  Finally!  An excuse for me to order the Under the Stars stamp set.  I've wanted that set every since I saw those moving arm bear cards after convention a few years back.  I just couldn't justify it until I had a party to plan.  And, since the annual family camp for families affected by Juvenile Arthritis (KAT-FISH Camp) will have an outdoor/Great Northwest theme this year, I think my stamps will get some use again in July. 

First, Isabel's invitation, I saw several ideas on Splitcoast Stampers that inspired me, but one by Sarah Wills was the one I eneded up CASEing.  I did it a little differently and also added the little party banner but I have to give credit to Sarah for the idea.


I used Island Indigo, Lucky Limeade, and Blushing Bride for the card base, grass and tent.  On the base, I sprayed Vanilla Simmer Smootz Spritz to mimic a starry night.  I ran the tent flaps through my crimper to make it look like it was gathered and pulled back.  The tent stakes are little pieces of twigs from a bush in our front yard and were tied to the tent flaps with linen thread.

The bear was stamped onto Crumb Cake and I colored his muzzle and stomach with my VersaMark marker.  His banner is made from Daffodil Delight and Melon Mambo cardstocks, letters stamped in Basic Black using the Calendar Alphabet and Numbers, and then the Itty Bitty Punches.  I sandwiched bakers twine between the circle piece and the letter piece to make each banner.  I punched a small hole in each hand of the bear and tied the banner on.

The sleeping bags were stamped onto pieces of Just Add Cake Designer Series Paper. 

Now for the fun party favors and activities.  We decorated the house with our camping equipment and supplies.  We put some green balloons on the floor and added an old Christmas tree along with a few woodland stuffed animals.  We also made signs that you might find in campground- don't feed the bears, stay on the trail, etc. 

I also cut several stars from soda cans and tied them to fishing line and a black helium balloon.  We had 13 balloons in the living room with the stars hanging from them to be our starry night. 


We made tie dye t-shirts and played a game called Mosquito Bite.  Each girl was given a sheet of small dot stickers and they had to "bite" their friends by sticking stickers to their back without getting caught.  The girl with the least stickers on their back won the game and got a prize.  They also played a game where they teamed up and had a minute to toss marshmellows into their mouths.  Team with the most marshmellows won.  We had planned to have a race to set up a tent in the front yard and also do some star gazing but the weather did not permit.  We of course made smores. 

For crafts, they made lanterns by decopaging different shapes onto glass jars.  I let them use some retired Stampin' Up! papers for this.  They also used some old non-Stampin' Up! ribbon that I wanted to use up.  They tied the ribbon around the mouth to make a handle and we put a candle in each one.

The cake was a camping scene.  It was made by a sister of one Isabel's friends.  The candles were actually hidden in the modeling chocolate trees.  She did a great job.


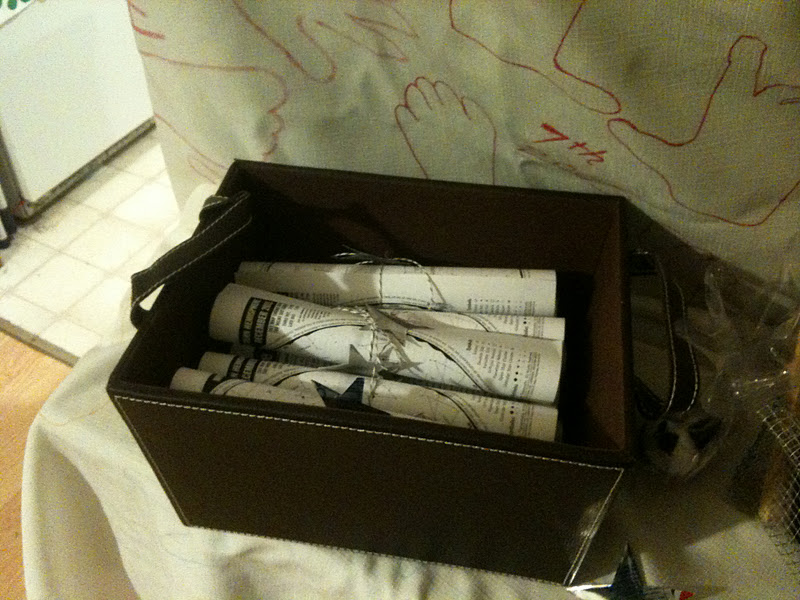
Party favors included a S'Mores kit and a star chart with one of the soda can stars tied onto it.  Anyone who did not receive a prize also got to pick from the left over game prizes since we were not able to play all of our games.  The S'more Kit Tags were made using My Digital Studio and I tied them to the bag using Holly Berry Bouquet  Designer Fabric.


They watched movies and talked the rest of the night.  We sent them home in the morning after a big breakfast of pancakes, eggs, bacon and sausage.

God Bless and Happy Stampin'!
Charity