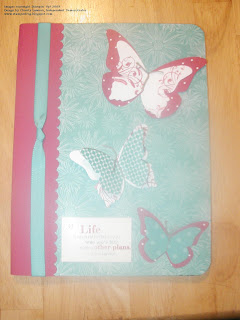
Using the same process used for the Good to Dream Journal, I made a second journal for our family to use for our new family hobby, letter boxing. What is letter boxing? Letter boxing is a unique hobby that combines old fashioned treasure hunting with ... rubber stamps! A great hobby for a stamping enthusiast. Gets me out in the sunshine instead of being hunched over a desk with ink on my fingers. :0) More information about our letter boxing trip will follow, but first, a few details about the journal and a sneak peek of things to come from Stampin' Up!™
I used some retired paper, Good Morning Sunshine designer series paper, as well as current card stocks, Chocolate Chip and Very Vanilla. I know, I know, don't tempt you with beautiful designer series papers that you can no longer have, especially ones featuring a retired in-color. The nerve of me! :0) There's a method to my madness. I wanted to share our letter boxing adventure, but I also wanted to let you know about a great new product coming soon from Stampin' Up! Available to you beginning TODAY! Many of you will have the latest holiday mini and on the last page, you will find My Digital Studio. This is a digital scrap booking software. It will have images from current stamp sets and you'll be allowed to expand the package as more stamp sets and colors are introduced. One of the more exciting features is that the software will also include some of your favorite retired in-colors, including Kiwi Kiss, Baja Breeze, Tangerine Tango... YEA! It's a fun software for those who like the look of a scrapbook page/album but aren't into all the work. And like any other scrapbook page, once you have it printed, you can add custom touches and embellishments to your heart's desire. So, don't be discouraged if you are missing the recently retired in-colors, there is a way to have them again! I just received my copy last night and I've already decided a cute book for Liam.
Now, back to letterboxing, I'll give an overview of the hobby here, but for more detailed explanations visit: http://www.atlasquest.com/ and http://www.letterboxing.org/index.php. Basically, a person hides a small plastic waterproof box along a trail. The box is well hidden such that if you are not looking for it, you won't find it. In order to find it, you must log into a site similar to those noted and find the clues for the box. Each box contains a log book and a unique stamp, often one carved by the person planting the box.
Once you have your clues, you head out to the trail with your own log book and personal rubber stamp in hand. You follow the clues until you find the box. Once you find the box, you carefully remove it from it's hiding spot. In the box's log book, you stamp your own stamp, date it and add any personal comment. Then, using the stamp in the box, you stamp your own log book. You can also register your find on one or more of the websites noted. Then, you carefully put the contents back in the box and return it to its original hiding place.
We discovered letter boxing after a friend of mine showed me an article in a local newspaper. It's such an affordable hobby for a family and it gets us out in the great outdoors. And you don't need much to get started, just a rubber stamp and a "trail name." You can have one stamp for the entire family or one for each member of the family.
Our first adventure was over Labor Day weekend. We made our book that morning and picked our destination, Bothell Bunnies here in Bothell. The trail is nearby and easy to find.  The box was named for the colony of tame bunnies you'll see along the trail (cared for my employees in the nearby business park). The kids had a great time and I got 30-40 minutes of exercise. The trail is also a nice place for a walk or bike ride so I'm sure we'll go back again. Here we are on our first adventure.
 The box was named for the colony of tame bunnies you'll see along the trail (cared for my employees in the nearby business park). The kids had a great time and I got 30-40 minutes of exercise. The trail is also a nice place for a walk or bike ride so I'm sure we'll go back again. Here we are on our first adventure.
The kids had so much fun, we planned our next two hunts. One near our church and another near the Space Needle.
Check out letter boxing, you might find a hobby you'll be surprised you enjoy. Plus, it'll give you an excuse to buy some stamps if you ever decide to start planting your own letter boxes.
God Bless & Happy Stamping!

